Monday, April 01, 2013

Vixie's Crafting Garden launches a new blog!


Hello everyone,

So I log in here today to let you guys know about random news. It has been a month since I have been talking about Maybelline (my favorite brand) and I decided it was time for a switch and updates.

For updates of course, this month I will be focusing on Clinique Brand (my other favorite brand, you'll know why soon) and will be throwing a tutorial of course as a surprise every now and then :) My mid-term exams have gotten over, I am free for now, and hence can give more time to blogging, hence I am here to introduce to you guys another non-girly side of me. I am a huge Anime fan, and watch Anime Series with dire dedication. So, I bring to you, a new blog by Vixie's Crafting Garden, where there is anything and everything about Animes!

If you're an anime fan like me, do check out Vixie's Crafting Garden Anime Talks

That's all for now.

Toodles,

Madii

Monday, March 11, 2013

Nail Art Stamps Guide!


Hello all,

Stamping Nail Art is a new way to create beautiful nail designs without wasting time. All you do is stamp pre-designed images within minutes and top it up with nail coat. There are a variety of companies creating stamps, and a lot of nail artists on the Facebook are selling off the utilities for the nail art stamps of the Chinese/Thai brands.

The best Stamping Nail Art company I have come across is Konad Stamping Nail Art. You could invest once in their professional kit and spend your lifetime creating those magical designs and driving everyone crazy with envy! The Professional Salon Case kit includes 331 image designs, 19 special Konad polishes, two stamps, three scrapers, top coat, base coat, and more.

I got the easiest demo from Nails Magazine to show you how stamping works. You apply a top coat on the nail like so.


Then you take Konad's special nail polishes and apply a thick coat on the design you want on your nails. There are variety of designs to choose from the nail art stamp plate.


Another utility given in the kit is a Scraper. You use the scraper and slide it off the texture plate to remove the excess nail polish so that you are left with only the nail polish in the stamp.


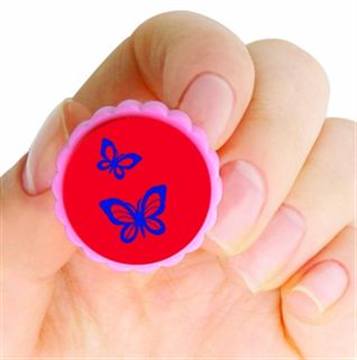
After you are left with the design, you use a rubber stamp (given in the kit) and press it on the plate to pick up the design. 


After picking up the design, stamp it on to your nails like a kid :D


Top it off with a nail coat to make your design ever lasting and you're done :) 


Nail Stampings can be very easy and offer a wide variety of designs. You just gotta explore the options and stop spending all that money on the expensive nail arts and manicures when you can have a beautiful result at home!

That's all for now,

Toodles,

Madii

Thursday, March 07, 2013

A Guide to Fimo Nails!

Hello ladies,

I am sure you all have heard the name Fimo before. Fimo is a brand of Staedtler which consists of Polymer Clay. Polymer Clay is a kind of dough clay which has to be baked in order to turn hard, and is used in clay creations. Advanced Polymer Clay Artists introduced a technique of Polymer Clay Canes, commonly called "Fimo Canes". These Canes are tiny sticks, which can be lightly or thickly cut and applied on the nails. Introduced as fruits, these canes can now be found in many shapes and designs and are fairly cheap. A single can can range from 50-120 rupee ranging on the location you are buying it from.

The best advice for the nail accessories is to buy them from online retails. There are about 50 girls on Facebook who run a home-based online shop and store all such unique nail accessories which you will have trouble finding in the city. You pay them via Easypaisa, and they have it delivered at your place. Some pages even have a cash-on-delivery (COD) method. The best thing about those pages is that the entrepreneurs get the materials from Thailand and similar hence the materials are all imported.

Applying the Fimo Canes is very easy as given in the following steps:

1. Take a fimo cane


2. Cut a thin strip off the cane with the help of a blade

3. Apply a color on the nail


4. Place the cane strip and coat with top coat again


That's it, you're done! Fimo Canes give a 3D effect and are always a useful accessory to keep.

That's all for now.

Toodles,

Madii.      

Wednesday, March 06, 2013

Peaches and Cherry Blossoms Nail Art Tutorial


Hello ladies,

Today, I will show you, a very easy yet beautiful tutorial to create on your nails. This nail art is of course inspired by Japanese Cherry Blossoms. It is easy to create since it doesn't take much time, nor efforts.

You will need the following materials:
- A Peach Nail Polish/Color as a base
- A Black Nail Polish/Color
- Red Nail Polish/Color
- White Glitter Nail Polish
 
Instructions:
 
1. Paint the base of the nail peach


2. Use black color to make a curved line

3. Use the black color again to make a curved line similar to the first one

4. Create five lines in total similar to the ones created before


5. Leaving the first stem alone, create hearts on the tip of the other four stems

6. Add white shine accent to each of the hearts

7. Add white dots to the remaining nail

That's it, you're done :)

Toodles,


Madii.    

Tuesday, March 05, 2013

Pink Hearts Galore Nail Art Tutorial


Hello lovelies,

Today, I will show you, a very easy tutorial to create an intricate hearts with boundaries on your nails. This nail art can be used as Valentine nail art as well. It is easy to create since it doesn't take much time, nor efforts.

Before we begin today, let me tell you something funny about myself. I have always been a nail biter in my childhood, hence I have tiny nails. I have been caring for my nails now and trying to grow the nail bed, but of course, it is a slow process. So you will have to bear with my nail art on small nails.

On to the tutorial, you will need the following materials:

- A Red Nail Polish/Color as a base
- A White Nail Polish/Color
- Neon Pink/Light Pink/Tea Pink Nail Polish/Color (I used Neon pink)
Silver/Transparent Glitter Nail Polish

Instructions:

1. Paint the base of the nail red


2. Use White color to make three hearts in a diagonal shape


3. Use Pink to create four diagonal stripes, two above the hearts and two below the nails with a thin brush. Also fill in the white hearts with the same pink color, leaving a little white outline as an accent


4. Use White again to create tiny dots on the first diagonal lines closest to hearts, and a tiny zigzag on the second diagonal lines.


5. Fill in the borders of the nail (after the zigzag) with silver glitter


That's it, you're done! Easy wasn't it?


That's all for now,

Toodles,

Madii.

Monday, March 04, 2013

Nail Art Basics!


Hey all,

So another common trend nowadays is the Nail Art techniques girls like to try out in order to make their hands look pretty. Today's nail artists are currently using different methods, that produce more wonderfully definite and simple designs than before. However, on an individual scale, many of us are afraid to try them out in fear that they might ruin our nails, or it might end up messy. Funny thing is, creating a nail art design is simpler than you even imagine. I agree some designs take time and patience, but patience always pays off right? :)

The best part of Nail Art is, anyone can do it. Obviously, it is universally considered that people who are creative by nature are the best at these arts, but hey, half of our brain is responsible for the creativity, you just gotta use it at the right time! Nail art learning is an ongoing process. We learn from each other and there is always something new in the market as ideas for creating new designs are every­where.

Few tips to make your Nail Polish look cool without haste are:

1. Use effect Polishes


Effect Polishes are common nail polishes however, they have a very unique feature, they start dissolving when you apply them on your nail, giving your nail a cool effect. For effects, I always trust Barry M. And yes, you can buy Barry M on Facebook through Barry M Pakistan. In above example, you can see that Barry M Crackle (to give crack effect) was applied on the hands, which automatically creates cracks on the nailpolish for grungy effect.

2. Use water decals, nail stickers or nail wraps


Nail Stickers and Nail Decals are always a welcome accessory. I have always used the Flirt and Kiss Company's decals, but decals are available almost everywhere. When it comes to Nail Stickers, the solutions are endless. You can buy nail stickers, make your own, buy kits and what not. If you are interested in a full high class company, then do check any outlet of Sentiments and if you're looking for something cheaper yet pretty, check out online pages on Facebook like Diva Store and Spyker Art. Like I said, the possibilities are endless and a lot to choose from!

3. Use micromarbles to create a Caviar Bead Nail Art

Microbeads are recently introduced on Online Nail Accessories pages and can create the cutest effects. All you need to do is apply a base color, then apply a top coat. While the top coat is still drying, dip your finger in the micromarbles case, and you end up with a beautiful layer of beads on your finger like so:


That's all for today, I will be back soon with new tutorials of course :D Oh by the way, we will be doing nail tutorials twice a week!

That's all for now,

Toodles,

Madii.

Sunday, March 03, 2013

Maybelline Diamond Glow by Eye Studio


So it was only recently, that my best friend sent me an Eyeshadow kit from Singapore. Though, she had no idea I was a Maybelline fan and was looking for the very eyeshadow quad. It was as if she read my mind. Anyways, the Eyeshadow kit that I am talking about are the Diamond Glow by Eye Studio and are a range of quad Eyeshadow pallet, or 4-in-1 eye shades. The problem with my reviews will of course be the fact that I manage to scram my hands on to imported products from worldwide and the names, shades, continuity and discontinuity varies from regions to regions. Maybelline is currently marketing the same product as EyeStudio Color Plush Silk Eyeshadow in the West, while Diamond Glow has been released for Asians. The only difference is that while the Asian are soft and shimmery, the new ones have a vibrant metallic and silky texture.

The best thing about the palette is that all of the sets are very colour coded, which becomes awesome for people who have just begun make up. I personally like palettes because a palette means more colour choices! Considering the fact that I am a blues and purples lover, the shade I own is 04 (Ocean Blue) as pictured below:


However, there are six palettes briefed under below:

01 Copper Brown


Shades: Silver Shimmer, Gold Shimmer, Bronze Shimmer and a Dark Brown Glimmer Accent
Common Look: Perfect for a casual day out!

02 Wine Pink


Shades: Shimmer Nude, Baby Pink Shine, Tea Pink Shimmer and a Plum Shimmer Accent
Common Look: Girls Night Out!

03 Gray Pink

 
Shades: White Glitter, Silver Pink Shine, Silver Grey Shimmer and a Black Shimmer Accent
Common Look: Party the night away!

04 Ocean Blue 


Shades: Silver White Glimmer, Baby Blue Shimmer,  and a Plum Shimmer Accent
Common Look: When You Go Ice Queen!

05 Fresh Green


Shades: Olive Shimmer, Pastel Green Shine, Green Shimmer and a Pine Green Shimmer Accent
Common Look: Nature ahoy!
 
06 Lilac Mauve

 
Shades: Purple Silver Shimmer, Pink Shimmer, Lavender Shimmer and  Shimmer Accent
Common Look: Late Night Sparks!
 
The same shades (slightly different) released in the west go as under:


Summary:

Pros: All shades are pearly and metallic. sturdy packing, modified applicator, soft colors, perfect for subtle, everyday, casual looks.

Cons: The shades are very light, not concentrated, last three to four hours, need more coats for the color to show

Best tip:
  • Illuminate – Sweep lightest shade all over eye.
  • Blend – Apply second shade across full lid and to the lower lash line for depth.
  • Emphasise – Sweep third shade from inner corner to middle of lid.
  • Contour – Line darkest shade on upper lash line for added intensity.

That's all for now,

Toodles,

Madii.

Saturday, March 02, 2013

Maybelline Dream Mousse Shadow


I must say, Maybelline is one of my favorite brands and I'm not a MAC person, since my experience with MAC has always been awful in one way or another. Maybelline Dream Mousse is one of my favorite Eye-shadows and its a shame that the product has now been discontinued, internationally, but living in Pakistan, you always come across Maybelline's Dream Mousse products, and I don't think I have seen anyone who has bought it and not liked it.

The shade I tend to use the most is number 60 (blue heaven) which I got from UAE last year, and it has never disappointed me in anyway. In fact, I love this product. Even though I own one shade, I came across using each and every one of them, and definitely found them at their best.

Some of its shades do tend to be sheer, you would definitely not see me wearing only the shadow itself, but the shade makes a perfect base for eye-shadows. Some people tend to call the product too shimmery, but shimmery is always better. Even when pulling a natural look, one needs highlight and shimmers for camera to catch the detailing of your eyes, so I say its all good. The best thing about it is, it lasts for hours on your eyes without a need of an eye primer, which is superb, since you tend to find eye primers in Karachi very rarely (excluding all those big marts like Naheed, Ebco, Agha's etc, I personally find them too expensive for my taste, and the middle class of our city cannot seem to be affording that) and the eye-shade acts as an eyelid primer on its own.

It has such a soft feel that you would only wish to apply it with your fingers and hence are extremely smooth to apply. So if you go to your local cosmetics shop and still find it there, give it a go, you'll like the soft colors for sure.

Summary:

Pros: Cute pot, pretty shades, smooth, lasts long (when used as a base), amazing mousse texture, shimmery

Cons: Creases when applied alone and a sheer product

Enough of the shadows for now, I'll show the shades below with colors.


and my personal used shade:


That's all for now,

Toodles,

Madii.

Friday, March 01, 2013

What this Blog is About! A Little Bit About Me :)


So, I am a Pakistani by birth. (You may run away if that scares you). I run a small business by the name of Vixie's Crafting Garden. But pretty soon (in weeks or days) I will be closing my business down due to my studies (final year Biomedical Engineering Student) and that will leave me completely helpless in the crafts world. So I will be blogging instead. This blog focuses on make-ups and cosmetics, and I will be updating it as soon as I get a chance of course.

I began my journey into crafting/entrepreneur world by Artoma, my ex-business now currently run by Annie (Alvina), when us two friends came together as an idea to do something with our skills, rather than just sitting around with all that knowledge crammed up in our heads waiting to pour out somewhere. However, due to misunderstandings and unfortunate events, friendships split, and I went my separate way to establish Vixie's Crafting Garden.

My Vixie's Crafting Garden will turn an year old this month, and of course, will be unpublished too until further notice. The reasons include many, but major being my final year and then moving out of the city, I will not be able to continue any orders, I may already be famous as the laziest entrepreneur out there, but I guess I will deserve it. But I have to thank you all everywhere for supporting my work. My followers at Deviantart, at Facebook, all encouraged me to go on and pursue what I love to do. As a token, I will be publishing a series of blogs, including tutorials, reviews, giving my secrets away of course, so that you all could make what I could make easily!

Toodles for now,
Keep a lookout for my new blogs!

Madii.